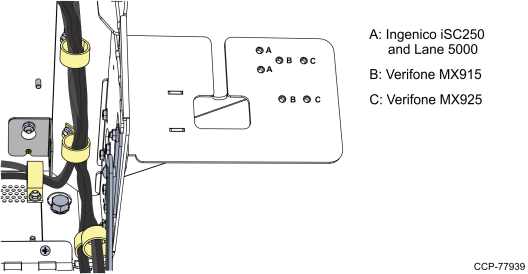
Installing the Verifone MX915 or MX925
To install the Verifone MX915 PIN Pad, follow these steps:
1.Remove the four M4 hex nuts that secure the square cover on the side of the kiosk.
2.Mount the side arm bracket onto the side of the kiosk.
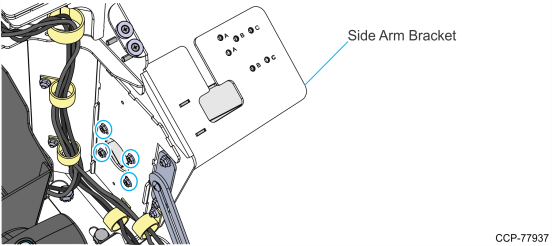
a.Align the four mounting studs of the side arm bracket with the four mounting holes on the side of the kiosk.
b.Secure the bracket using four M4 hex nuts.
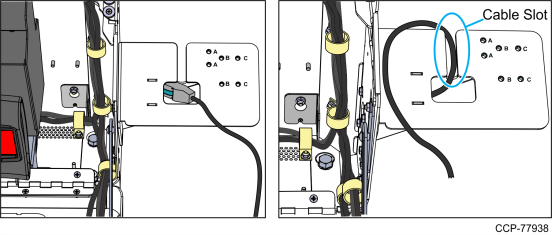
3.Insert the PIN Pad Cable through the cable access hole on the PIN Pad Arm and position it onto the cable slot.
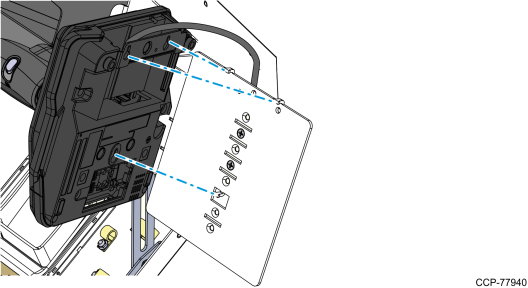
4.Install the Spacepole Plate on the PIN Pad Arm.
Caution: Ensure that the PIN Pad Cable is not pinched.
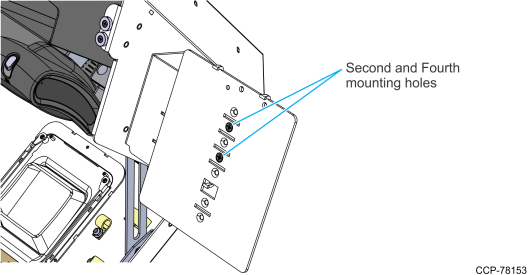
a.Align the second and fourth mounting holes of the Spacepole Plate with the appropriate mounting holes for each PIN Pad model.
b.Secure the Spacepole Plate to the PIN Pad Arm using two screws.
5.Install the PIN Pad on the Spacepole Plate.
a.Connect the PIN Pad Cable to the PIN Pad device.
b.Mount the PIN Pad onto the Spacepole Plate using the hook features and slide it down to lock in place.
Note: Ensure that the PIN Pad is properly hooked to the Spacepole Plate.
c.Secure the PIN Pad using one screw.

6.From inside the kiosk, pull the PIN Pad Cable so it does not hang loosely outside the kiosk.
7.Route and connect the PIN Pad Cable to the motherboard. For more information, refer to Routing the Cable for Large PIN Pads.
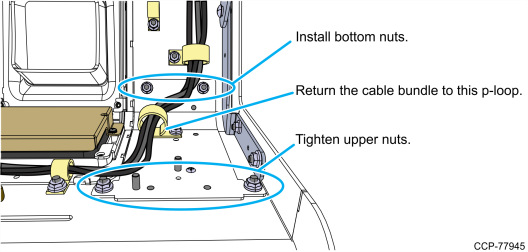
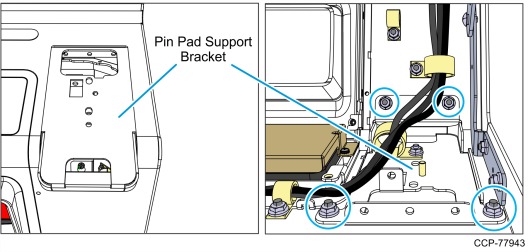
8.Remove the Small PIN Pad Support Bracket.
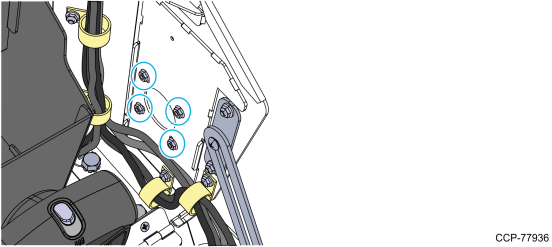
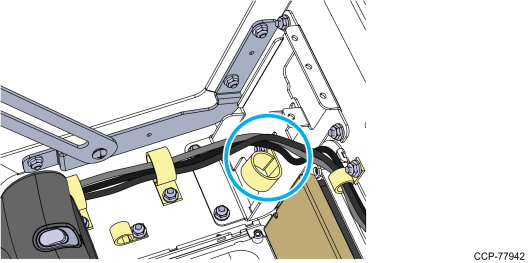
a.Remove the cable bundle from the p-loop indicated in the following image.
b.Remove the two bottom nuts and loosen the two upper nuts, and then slide up the Small PIN Pad Support Bracket to remove it from the unit.
9.Mount the Small PIN Pad Cover onto the Lower Module Door.
a.Slide down the hooks of the Small PIN Pad Cover onto the upper mounting studs.
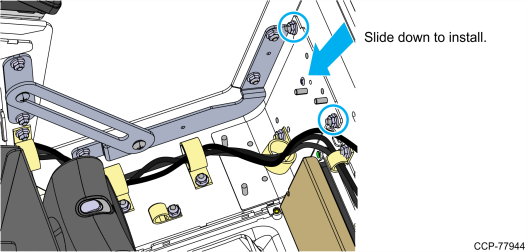
b.Tighten the two upper nuts and install the two bottom nuts, and then return the cable bundle into the p-loop.